

Escrito porMo Kahnel


Generas un personaje que se ve perfecto en un retrato dramático. Luego pides a la misma persona caminando por un mercado, girando hacia un lado, o reaccionando con miedo, y el cabello cambia, el abrigo desaparece y el rostro pertenece a otra persona. Esa brecha entre una imagen memorable y una identidad confiable es donde fallan la mayoría de los flujos de trabajo de arte conceptual de personajes con IA.
Un personaje utilizable no es una sola toma de héroe. Es un sistema visual con rasgos fijos, variables flexibles y suficiente material de referencia para sobrevivir a nuevas poses, iluminación, encuadres y formatos. La misma disciplina que ayuda a un equipo de desarrollo de juegos a reducir el trabajo repetido también ayuda a un autor independiente a mantener a un protagonista reconocible en una portada, ilustraciones interiores, miniaturas y publicaciones promocionales.
Un creador me mostró recientemente una secuencia que comenzaba con una mujer llamativa con una capa verde. La primera imagen tenía la expresión correcta, cabello castaño ondulado y un lenguaje de formas atractivo. El siguiente prompt la colocaba a caballo. El tercero la trasladaba a un interior iluminado por velas. Para la imagen final, la capa era roja, el cabello era lacio y la estructura facial había cambiado tanto que solo el creador sabía que las imágenes representaban al mismo personaje.
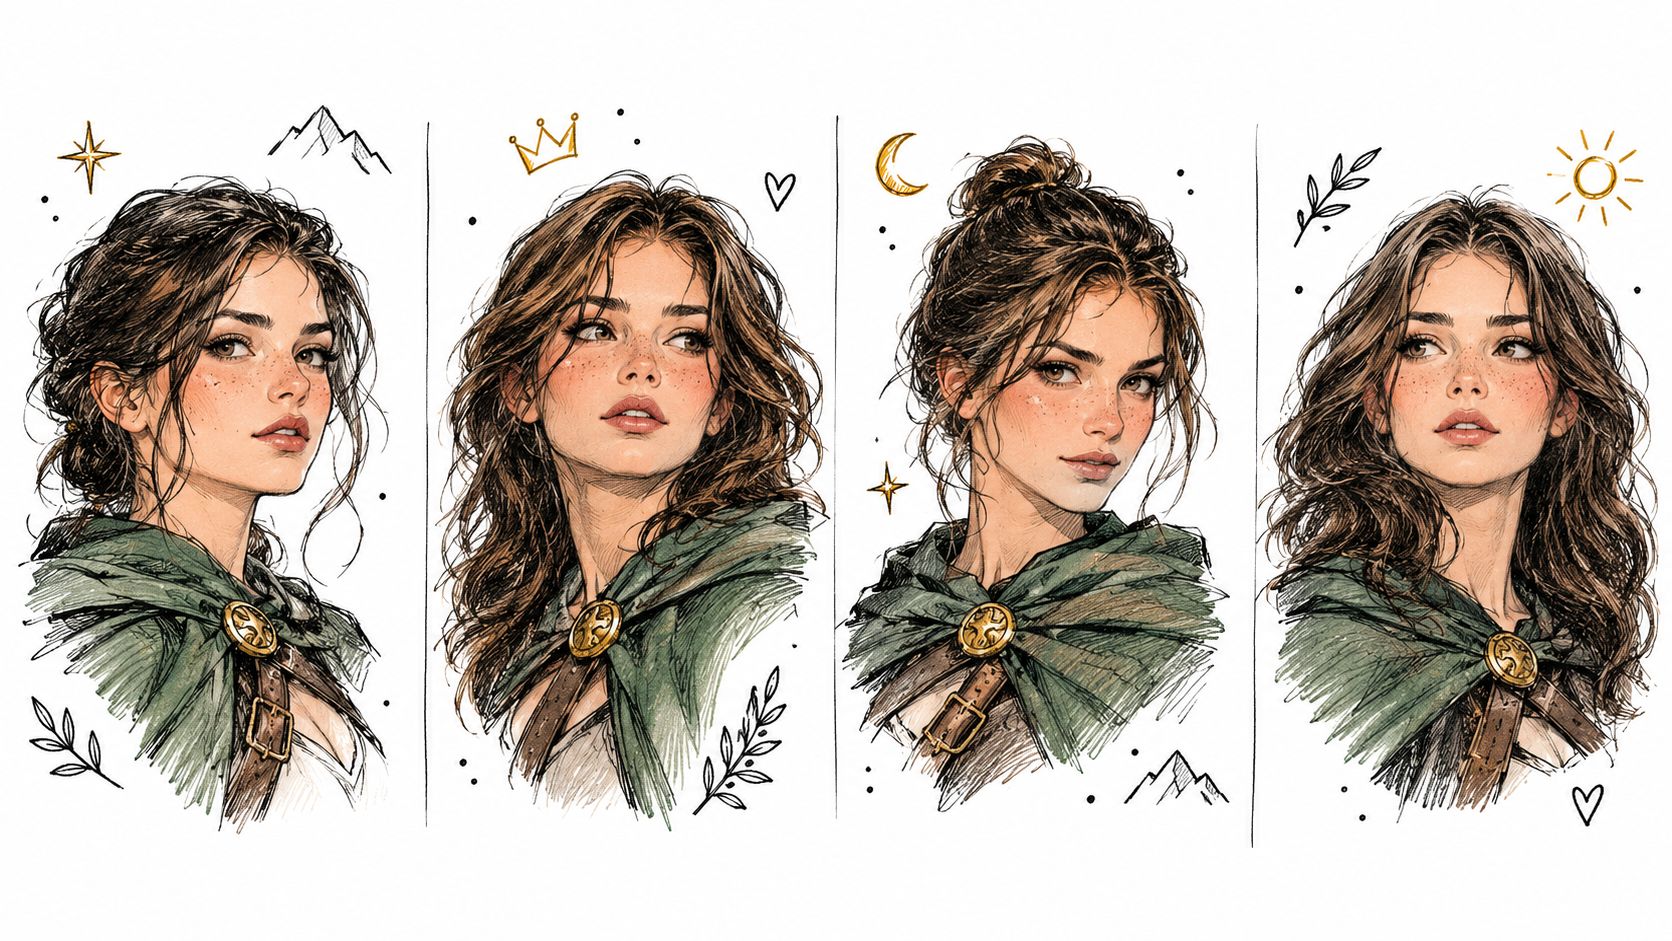
Eso ocurre porque los generadores de imágenes no preservan automáticamente la identidad de la forma en que lo hace un artista humano. Interpretan cada solicitud como una nueva disposición de probabilidades visuales. Si el prompt enfatiza una espada, una tormenta o un ángulo de cámara inusual, el sistema puede sacrificar detalles faciales o marcadores de vestuario para satisfacer la escena.
Unatoma de héroedemuestra que una imagen puede verse bien. Un sistema de personajes demuestra que el diseño puede funcionar repetidamente. El segundo estándar requiere una silueta controlada, accesorios reconocibles, una paleta definida y referencias visuales que te indiquen qué rasgos deben permanecer estables.
Comienza listando los elementos que hacen que el personaje sea reconocible a simple vista:
Unaguía práctica sobre la consistencia de personajes en la IAes útil cuando necesitas convertir esas observaciones en reglas de referencia repetibles. Los creadores que gestionan varias campañas visuales también pueden comparar su proceso de imágenes con otrasherramientas principales de marketing con IA, especialmente cuando un personaje debe aparecer en muchos formatos de contenido.
Practical rule:Si quitar un accesorio hace que el personaje sea anónimo, ese accesorio pertenece al sistema de identidad central, no a la capa de estilo opcional.
El contexto comercial hace que esta disciplina sea más importante. El arte conceptual se ha convertido en un segmento industrial mensurable; un resumen de 2026 estimaba unmercado global de arte conceptual de 4.800 millones de dólares en 2023y proyectaba unaTasa de Crecimiento Anual Compuesto (CAGR) del 8,2% de 2024 a 2032 (WorldMetrics). El diseño de personajes se integra en ese flujo de trabajo para juegos, cine, animación y publicaciones, donde las decisiones visuales tempranas influyen en la producción posterior.
Un mensaje sólido no comienza con una ubicación ni con un estado de ánimo. Comienza con la identidad del personaje y luego añade las condiciones visuales que pueden cambiar de forma segura.
Escribe los cimientos en capas. Usa un vocabulario concreto, ya que decir “mujer de fantasía misteriosa” le da demasiada libertad al generador, mientras que “mujer delgada con rostro ovalado y estrecho, cabello castaño ondulado hasta los hombros, ojos ámbar y una capa con capucha verde desgastada” establece puntos de referencia útiles.
Usa esta secuencia como plantilla de trabajo:
Las primeras cuatro capas deben permanecer casi sin cambios mientras exploras las escenas. Las últimas dos pueden evolucionar. Esta separación evita que un nuevo entorno reescriba al personaje sin querer.
Mantén una hoja de personaje privada junto a la instrucción. Coloca “cabello castaño ondulado”, “capa verde” y “broche de medialuna plateada” en la columna inmutable. Coloca “corriendo bajo la lluvia”, “vista de tres cuartos” y “expresión de enfado” en la columna flexible.
Esa distinción también mejora la edición. Si una imagen generada tiene el rostro correcto pero las botas equivocadas, puedes corregir las botas sin reemplazar todo el concepto. Si el rostro es incorrecto, no intentes compensarlo añadiendo más atmósfera o lenguaje decorativo. Regresa al bloque de identidad.
Laguía para principiantes sobre ingeniería de instruccionespuede ayudar a los nuevos usuarios a comprender cómo los términos descriptivos influyen en el resultado, pero la consistencia depende menos de escribir el mensaje más largo posible que de preservar los mismos descriptores de alto valor.
El trasfondo de un personaje debe influir en las elecciones de diseño en lugar de ser un dato aislado. Un mensajero del desierto podría usar protección facial en capas, llevar equipo marcado por el polvo y pararse con una postura inclinada hacia adelante. Esas elecciones comunican una historia a la vez que le proporcionan al modelo relaciones visuales para reproducir.
Mantén la instrucción aburrida en lo que respecta a la identidad. Guarda la experimentación para la pose, el escenario y la iluminación.
El estilo determina lo que comunica el personaje antes de que el espectador lea la descripción. Un diseño semirrealista puede sugerir un drama realista, el trabajo inspirado en el anime puede amplificar la expresión y la claridad gráfica, y la ilustración pictórica puede hacer que el personaje parezca parte de un libro de cuentos o de un mundo de fantasía prémium.
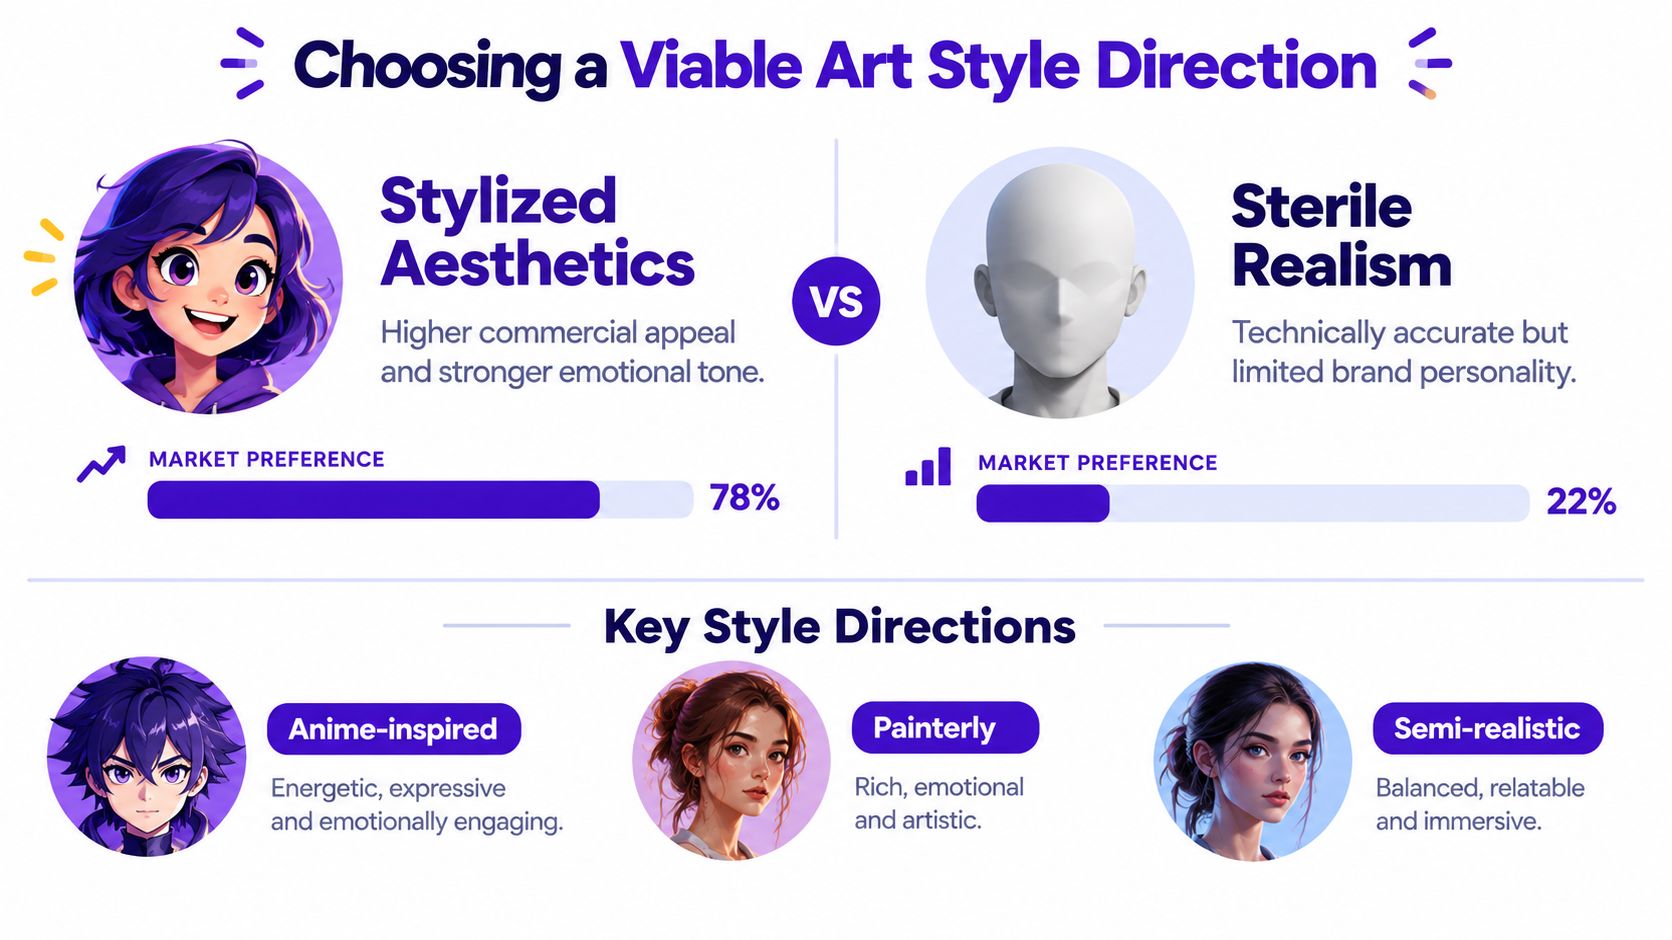
El gráfico comparativo proporcionado muestra unadivisión de preferencias del 78% frente al 22%, pero esa cifra no se incluye en los datos de mercado verificados disponibles para este artículo, por lo que no debe considerarse como una medición industrial objetiva. La conclusión defendible es cualitativa. Los comentarios recientes del mercado describen una demanda de trabajos estilizados comoArcaneyHades, al tiempo que observan un agotamiento por la presentación 3D estéril (vSquad).
Los estilos inspirados en el animeofrecen una gran legibilidad facial, anatomía simplificada y ojos expresivos. Funcionan bien para avatares, historias influenciadas por el manga, personajes coleccionables y contenido social. Su limitación es la familiaridad. Sin una silueta distintiva, lógica de vestuario o una decisión de color, el resultado puede parecer intercambiable.
La ilustración pictóricacrea atmósfera a través de pinceladas, bordes y relaciones de color controladas. Se adapta a portadas de libros, escenarios de fantasía, ficción histórica y arte clave promocional. La desventaja es la consistencia en activos pequeños. Las pinceladas sueltas pueden oscurecer los marcadores faciales y de vestuario que deben mantenerse estables.
El semirrealismoequilibra una anatomía creíble con formas diseñadas y exageraciones controladas. Puede respaldar el desarrollo de juegos, presentaciones cinematográficas y proyectos editoriales serios, pero a menudo falla cuando el artista busca el detalle de la superficie antes de aclarar la identidad gráfica del personaje.
Un estilo debe responder a tres preguntas comerciales:
La guía para portafolios a menudo favorece las decisiones estilizadas para artistas junior en lugar de estudios puramente realistas, porque la estilización revela el criterio de diseño. Eso no significa que el realismo no tenga valor. Significa que el artista debe mostrar elecciones, no solo capacidad de renderizado.
Comienza con el estilo más simple que comunique la personalidad del personaje. Añade detalles de materiales solo después de que el rostro, la silueta y la jerarquía del vestuario sigan siendo legibles en una imagen pequeña.
La primera generación es evidencia, no un diseño final. Genera suficientes variantes base para identificar fortalezas recurrentes, luego deja de producir nuevas imágenes y comienza a editar la estructura más fuerte.
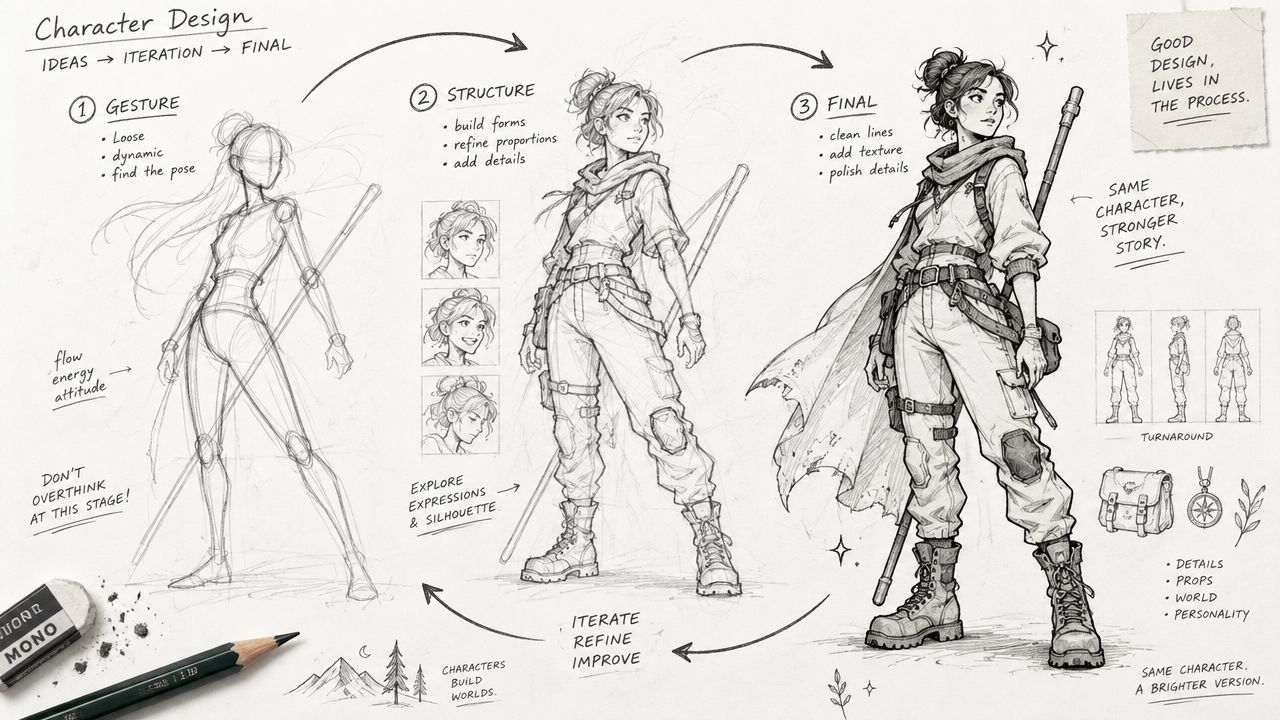
Utilizo un bucle de iteración con un propósito claro para cada pasada:
Una imagen pulida aún puede ser un diseño débil. Inspecciona los ojos en diferentes ángulos, la relación entre la cabeza y los hombros, la forma en que cae el abrigo durante el movimiento y si el accesorio sigue siendo físicamente plausible. La IA a menudo produce detalles locales atractivos mientras rompe la estructura más amplia.
Genera estudios de expresiones y poses antes de comprometerte con una ilustración clave. Un retrato neutral te dice si el rostro funciona. Un perfil pone a prueba la nariz, la mandíbula y la masa capilar. Una postura de cuerpo entero pone a prueba la silueta. Una pose en movimiento revela si el vestuario pertenece al personaje o solo se ve bien cuando está cuidadosamente arreglado.
El siguiente vídeo puede proporcionar una referencia visual para pasar del gesto y la estructura hacia una ilustración de personaje terminada:
Usa un registro de decisiones simple para cada versión aprobada: qué cambió, por qué cambió y qué marcadores de identidad deben permanecer intactos. Esto evita la generación interminable de instrucciones (*prompting*), donde cada nueva salida introduce otra revisión sin seguimiento.
Una buena iteración responde a una pregunta. Si no puedes nombrar la pregunta, no generes otra imagen todavía.
Un concepto puede tener éxito visual y aun así fallar en la producción. Las dimensiones de salida pequeñas ocultan dedos rotos, joyas turbias, textura de tela débil y bordes dentados. La mejora de escala (*upscaling*) debe ampliar un diseño sólido, no disimular problemas estructurales.
Antes de ampliar, inspecciona la imagen en su tamaño de uso previsto. Para el concepto de la cubierta de un libro, comprueba si el rostro y la silueta sobreviven en una miniatura pequeña. Para una referencia de juego, comprueba si las costuras de la ropa, el equipo y las proporciones siguen siendo claros cuando la imagen se ve junto a otras notas de producción.
Trabaja desde los errores grandes hasta los pequeños:
Unescalador de imágenes por IAdedicado puede ayudar a ampliar un resultado seleccionado, pero revisa la imagen ampliada en lugar de asumir que los píxeles añadidos equivalen a mayor calidad. La mejora de escala puede fortalecer las pestañas, pero también exagerar un dedo incorrecto o inventar textura en un área plana.
Consigue un archivo maestro con capas en un editor como Photoshop, Krita o Affinity Photo. Separa el contorno, la ropa, el cabello y los accesorios cuando sea posible. La guía técnica delrecurso de diseño de personajes del Instituto Nacional de Cinerecomienda conservar estas capas del archivo maestro, usar bocetos de referencia a aproximadamente40–50% de opacidady aplanar el color antes de sombrear para reducir los errores estructurales.
Crea una hoja de personajes limpia, una imagen de presentación y cualquier recorte promocional como salidas separadas. No forces a una sola composición a servir para todos los propósitos. Un giro (*turnaround*) necesita vistas neutrales y una construcción clara, mientras que una imagen de portada necesita jerarquía, atmósfera y espacio para la tipografía.
Verifica las licencias antes del lanzamiento comercial. El derecho de autor generalmente protege la expresión visual, literaria o gráfica específica de un personaje en lugar de una idea abstracta, y los tribunales de EE. UU. consideran rasgos visuales consistentes, atributos de personalidad y elementos narrativos únicos en un medio fijo (Ley DaeryunSi otra parte va a utilizar el personaje, un acuerdo de licencia por escrito debe definir los derechos, el territorio, la duración, el control de calidad y los usos aprobados (Ley de Daeryun sobre licencias de personajes).
La coherencia resulta más fácil cuando dejas de tratar cada imagen como un prompt aislado. Crea un paquete de referencia que actúe como la fuente de la verdad del personaje y úsalo siempre que crees una nueva postura, escena o variante de marketing.
Un paquete útil incluye un retrato neutral, vista de perfil, vista frontal de cuerpo entero, vista lateral, vista posterior, estudios de expresiones, detalles clave del vestuario, muestras de paleta y un breve párrafo de identidad. Los giros ortográficos y las hojas de modelo son especialmente útiles porque muestran el diseño sin perspectiva ni iluminación dramáticas. Una guía de cartera recomienda al menos2 proyectos de 8 a 10 páginas cada uno, que incluyan vistas planas frontales, laterales y traseras, cuadrículas de iteración y hojas de expresiones (Escuela Hideout).
Anota lo que el generador y el editor humano deben preservar:
El entrenamiento de modelos personalizados y los flujos de trabajo multimodales son cada vez más importantes en la producción de personajes asistida por IA, pero el entrenamiento no puede reparar un diseño poco claro. Proporcione al sistema un paquete de referencia sólido primero y luego pruébelo con poses y entornos deliberadamente diferentes.
La necesidad comercial es considerable. Un informe de 2026 proyectó el mercado global de los videojuegos en212.400 millones de dólares para 2026, mientras que otro informe estimó el mercado de externalización de arte para juegos en5.800 millones de dólares en 2025, representando el arte conceptual aproximadamente14.6%de los ingresos en ese segmento (WiFiTalents). Esas cifras explican por qué los estudios y los creadores independientes necesitan personajes que puedan pasar de la ideación a convertirse en recursos de producción fiables.
Revisa la biblioteca como un conjunto. Si una imagen parece brillante pero rompe las reglas establecidas, modifícala o exclúyela. Un personaje reconocible con una postura modesta es más valioso que una imagen espectacular que obligue a la audiencia a empezar de cero.
starryai convierte prompts de texto, referencias y aportes creativos en imágenes de IA descargables, lo que resulta práctico para probar identidades de personajes, poses y direcciones visuales antes de comprometerte con un diseño final. Visitastarryai, crea un prompt de personaje principal y construye un paquete de referencia a partir de los resultados más sólidos y coherentes.


.svg)