

Written by Mo Kahn on


People classified deepfake images of people correctly only 62% of the time in a peer-reviewed study published in the Journal of Cybersecurity. A convincing face isn't proof that a camera captured it, and making AI photos that look real takes more than smoothing away obvious artifacts.
The useful standard is a scene that holds together: believable light, a consistent subject, a plausible place, and an honest explanation of how you made it. That's a production habit you can practice, whether you're transforming a selfie, developing a fictional character, or staging a product scene.
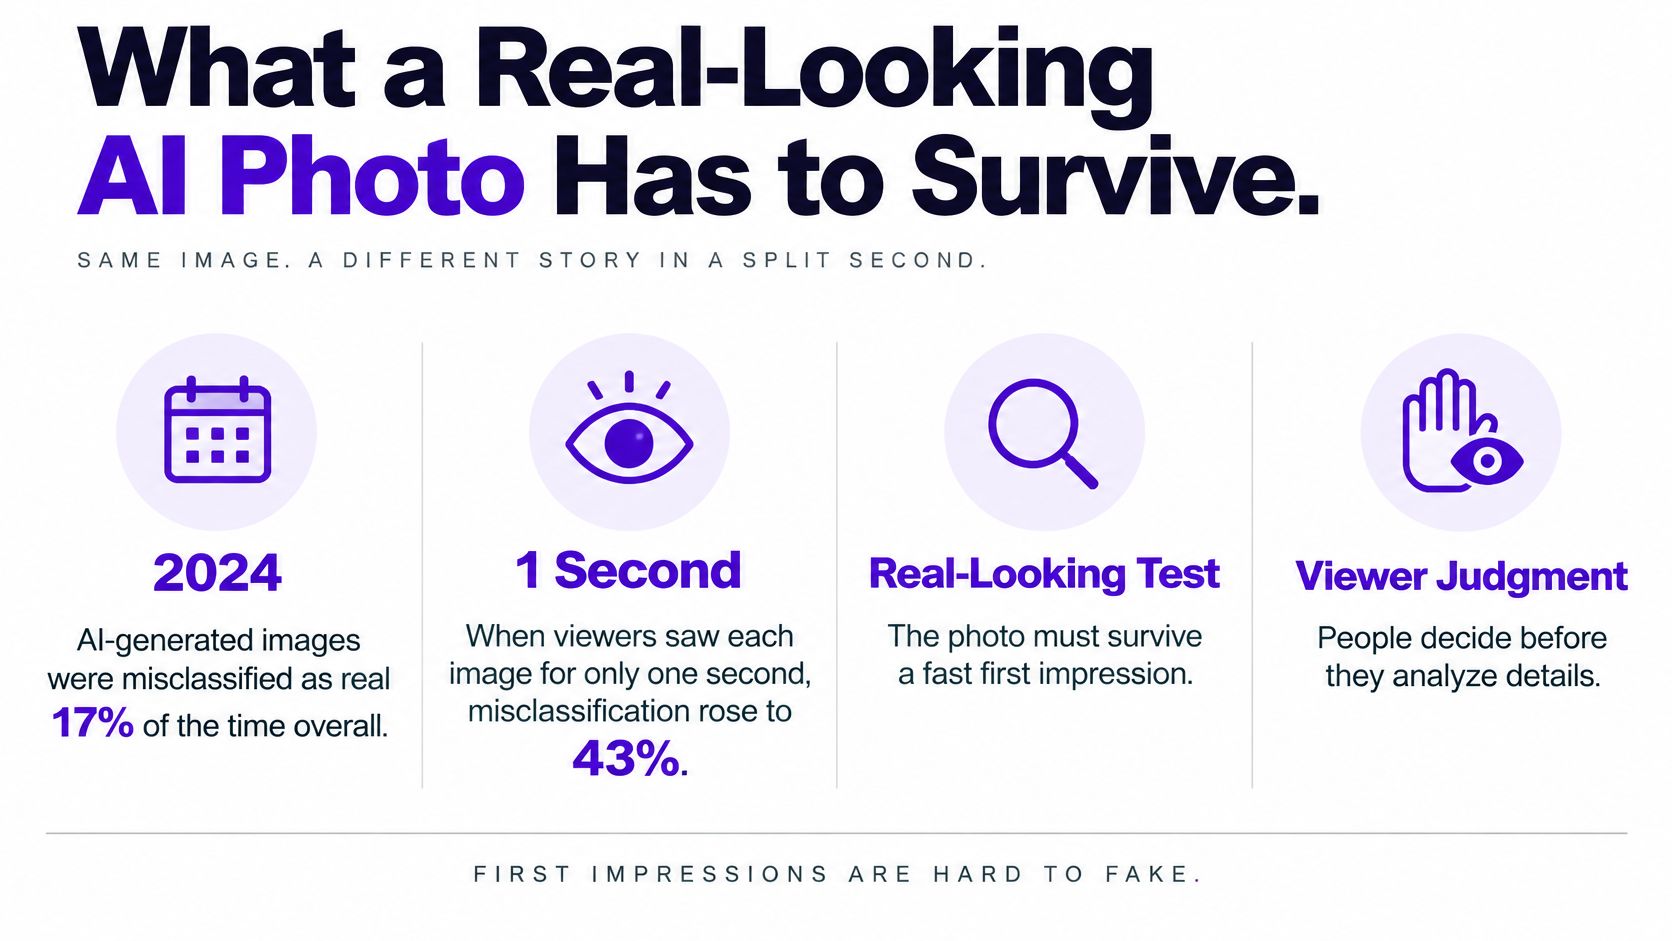
The first test happens before anyone zooms in. In experiments with more than 50,000 respondents, AI-generated images were misclassified as real 17% of the time overall, rising to 43% when viewers saw each image for only one second, according to the Institute for Public Relations' summary of the 2024 experiments.
That's the kind of look a TikTok frame, an Etsy thumbnail, or a book-cover mockup gets. Someone notices the person and the light, forms an impression, and moves on without counting fingers.
The distinction between a quick impression and an inspected image matters.
Say you're making a fictional author character outside a cafe. Her face looks convincing, but the pavement tilts upward, her bag strap disappears into her coat, and sunlight reaches her from opposite directions.
The problem isn't insufficient beauty. It's that no single camera could comfortably explain the scene.
Aim for a still that could have come from one camera in one place. The subject needs somewhere to stand, the background needs ordinary depth, and the visible surfaces need compatible illumination.
For an unfamiliar reference image, PeopleFinder reverse image search offers a way to look for other appearances and useful context. Treat matches as leads, not proof that a photograph is authentic or that you have permission to reuse it.
Practical rule: A photographic look is an aesthetic result, not a certificate of origin.
Camera choices, candidate selection, detail inspection, and disclosure solve different problems. Surviving a glance means the composition feels plausible; telling people it's synthetic means they aren't asked to mistake that plausibility for evidence.
Prompt settings that read as a photograph
| Choice | Photographic range | Example phrase |
|---|---|---|
| Subject and pose | One person, ordinary action, hands partly visible | woman in her 30s tying a shoe |
| Lens | 35mm or 50mm equivalent | shot on a 50mm lens |
| Aperture | f/2.8 to f/5.6 | f/4, gentle background blur |
| Light | One key source with matching shadows | overcast window light from camera left |
| Time and place | A real hour and a plausible location | Tuesday morning, corner cafe |
| Texture | Pores, fabric weave, light grain | visible pores, light film grain |
| Imperfection | One small real-world flaw | one flyaway hair |
| Color | White balance that matches the room | daylight white balance, no color grade |
Treat these as creative directions, not actual capture metadata. A generated image wasn't necessarily exposed through the lens you name, and a model may interpret the settings loosely.
Start with the subject and action. Tying a shoe gives the body a reason to bend, gives the eyes something to look toward, and makes the scene easier to judge than a vague request for a candid pose.
Use a 35mm or 50mm equivalent as a practical starting point for environmental portraits. These choices encourage a frame that includes the person and enough surroundings to explain where they are.
An ultra-wide description can invite stretched limbs or exaggerated foreground objects. A heavily compressed beauty-portrait treatment can make the room feel like a backdrop rather than a place the subject occupies.
Keep the requested aperture between f/2.8 and f/5.6, with f/4 as a useful starting point for a standing person. Ask for gentle background softness, not a featureless blur that hides every relationship between subject and setting.
Those settings aren't universal laws. If the image must explain a product label or an entire outfit, name what must remain sharp rather than trusting aperture language alone.
Specify the source, direction, and softness: overcast window light from camera left. Camera left means the photographer's left while facing the subject.
Don't add a glowing rim around the hair unless the location contains a plausible source behind the person. A window-lit cafe doesn't automatically need studio edge lighting, a sunset halo, and a beauty dish.
Use an ordinary time and place, such as a weekday morning in a corner cafe. The weekday won't mechanically determine the light, but it gives the scene an everyday context instead of an unspecified cinematic void.
Texture should describe material. Ask for visible pores, woven cotton, and restrained grain, not skin covered in artificial grit.
A paste-ready starting prompt is:
A woman in her 30s tying a shoe on a city curb, shot on a 50mm lens at f/4, overcast light from camera left, Tuesday morning, visible pores and fabric weave, one flyaway hair, daylight white balance, gentle background blur.
Keep that sentence stable during your first attempt. Change a concrete choice when something fails, rather than appending another string of adjectives.
A reliable build separates deciding, generating, selecting, and repairing. Don't ask an editing pass to rescue a frame that never made physical sense.
Use this overview to keep the production stages distinct.
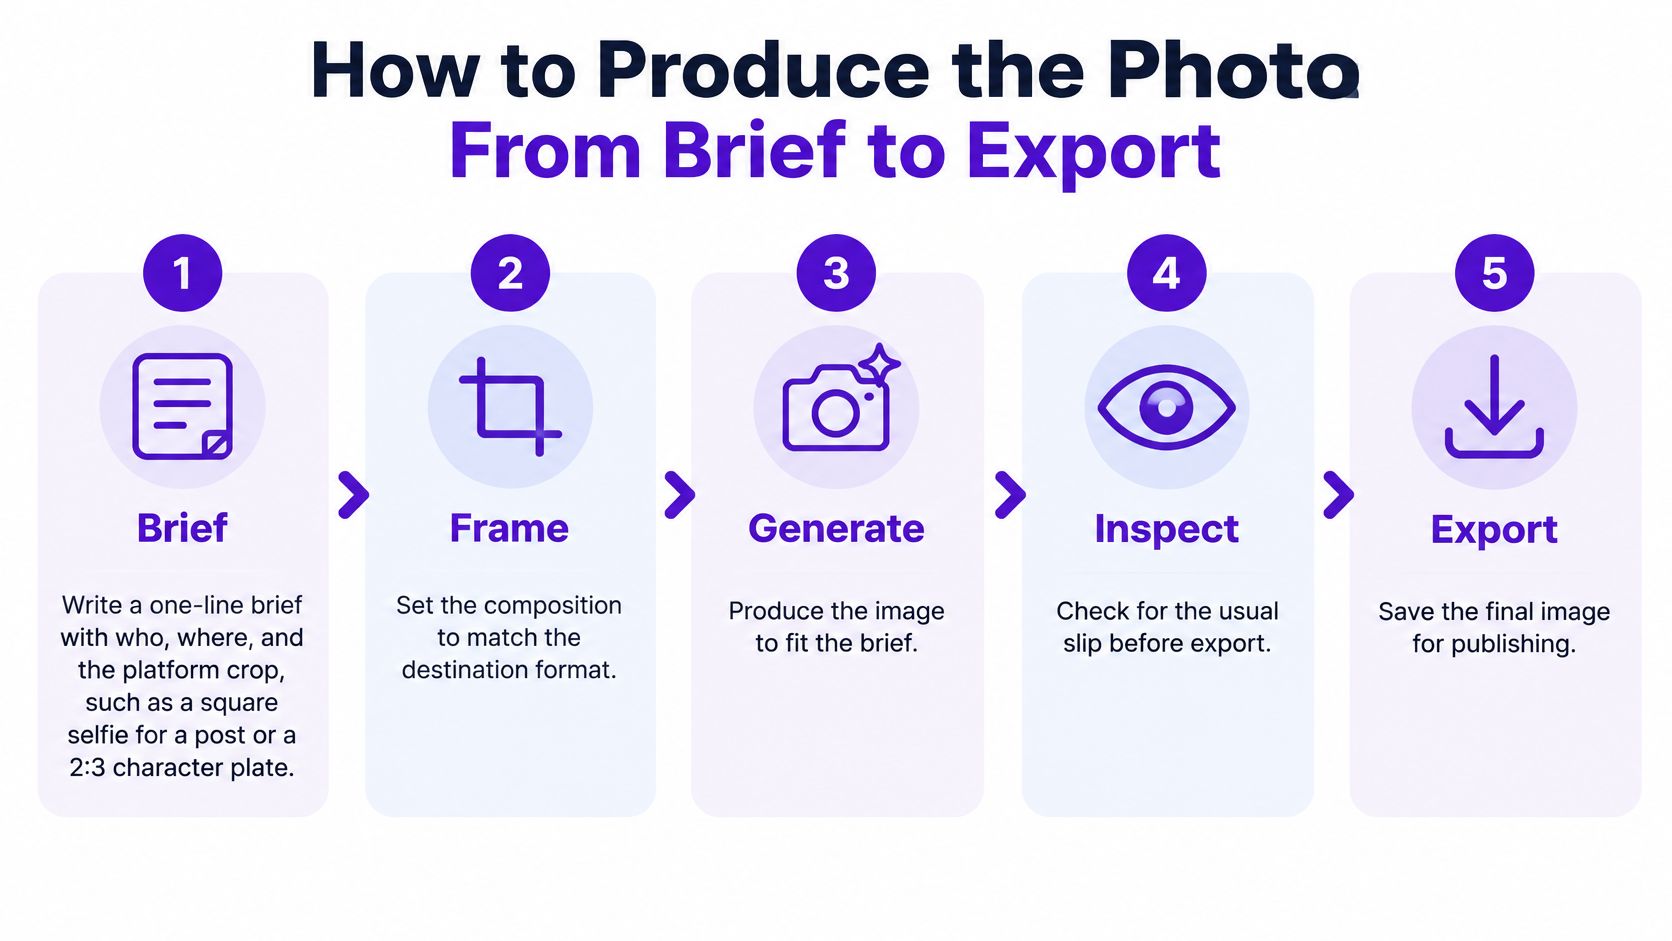
Write the one-line brief. Name who, where, and the destination crop. For example: a fictional cafe owner fastening an apron, square crop for a social post. For a book project, you might choose a 2:3 character plate with space above the head. The usual slip is writing a backstory without deciding what needs to fit inside the frame.
Translate the brief into a prompt and canvas. Include character, setting, mood, action, and camera feel. On starryai, describe your idea, pick a style, select a canvas size for the platform where you'll share it, and click Generate. Choose the composition before generation so you aren't cutting away the important action afterward.
Generate a batch of at least eight candidates. Treat this as a working selection habit, not a guarantee of success. Keep the core prompt steady so you can compare interpretations of the same assignment. The common mistake is declaring the first attractive face the winner before checking the rest of the frame.
Reject and compare before editing. In a large diffusion-image study published by ACM, human-curated images were judged more photorealistic than 408 of 482 uncurated counterparts, or 84%; the largest improvement was 31 percentage points for images with initial detection accuracy of 30% to 50%, and category detection accuracy was 72.7% for portraits, 77.2% for full-body images, 76.2% for posed groups, and 73.4% for candid groups. Use those findings as a reason to select carefully, not as a ranking of what your own generator can do. Reject anatomy, geometry, lighting, and meaning errors before you become attached to an expression. Give group compositions a harder pass because each additional person creates more relationships to inspect.
Edit only what failed. Correct a local lighting mismatch, remove an intrusive background object, or tighten the crop. If you're starting from a reference, the AI image-to-image workflow is useful for understanding how to guide a transformation from an existing image. Don't restyle the entire frame because a small corner needs attention. A global grade can obscure the original problem while introducing a new one.
Export and check the actual destination. Open the saved file rather than judging only the generation preview. Look at it full frame for three seconds, then reduce it to thumbnail size. Stop when the thumbnail has a clear subject and the full frame supports a coherent light direction. If every candidate failed selection, simplify the pose or change the location rather than lengthening the adjective list.
For a visual companion while you work, keep the demonstration separate from your final acceptance decision.
Save the chosen prompt alongside the approved file. That small habit lets you distinguish a deliberate change from an accidental drift when you return to the project.
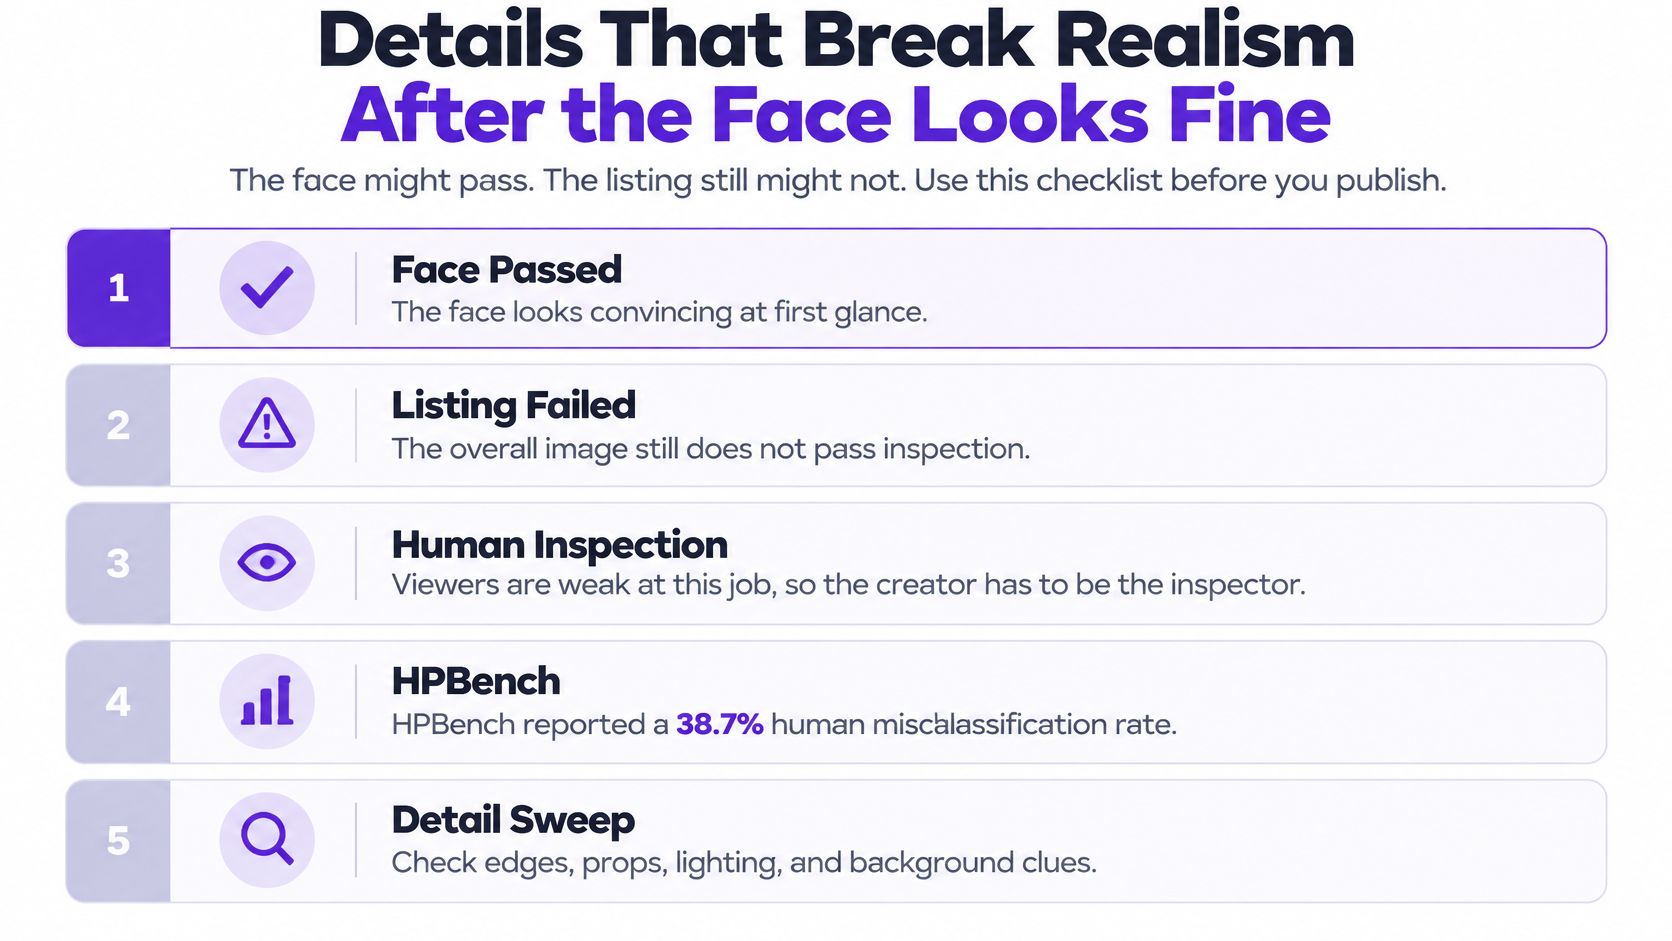
A face can look convincing while the scene gives the game away. A synthetic model may hold a mug naturally, yet the handle joins the wrong side, the logo is nonsense, or a reflected window has no counterpart in the room.
Viewers can miss these errors at a glance. HPBench reported a 38.7% human misclassification rate, with the strongest participant identifying 73% of images correctly and the weakest 40%.
Use a deliberate sweep rather than judging whether the picture generally looks good.
Pre-publish failures and the fix
| Region | Typical failure | Action |
|---|---|---|
| Hands | Extra, missing, or fused fingers | Regenerate or crop the hands out |
| Eyes and teeth | Mismatched catchlights or melted teeth | Reject the frame |
| Text and logos | Gibberish signs, labels, or brand marks | Replace the lettering in an editor or remove it |
| Jewelry | Extra stones or metal fused to skin | Zoom to 100% and reject |
| Reflections | Highlight from a light that is not in the scene | Match it to the key light or regenerate |
| Shadows | Floating subject or two shadow directions | Keep one light and regenerate |
| Object counts | Odd earrings, sleeves, or chair legs | Count pairs before export |
| Image set | Face, outfit, or time of day drifts | Lock one reference frame |
Start with fingers wrapped around an object. Follow each visible finger toward the palm and check whether the grip could hold the item.
Then inspect eye catchlights and teeth. Catchlights should fit the scene's light sources, though they need not match exactly because the eyes face different directions.
Skin should show material variation rather than uniform smoothing. This guide to realistic skin texture covers that detail. A convincing complexion still needs to belong to a coherent scene.
Read signs, labels, and logos at 100% zoom. If the intended words are unclear, replace them in an editor or remove them. Approximate lettering can misrepresent a real product.
Check where earrings, necklaces, glasses, and rings meet skin. Follow chains around the neck, and make sure stones remain distinct from fingers and fabric.
Trace highlights and cast shadows back to their likely source. In a simple lighting setup, an unexplained second shadow direction is a reason to regenerate, not an effect to excuse.
Reflections need to agree with both the light and the scene's geometry. A mirror should not reveal a different outfit, and a shiny tabletop should not introduce objects missing from the room.
Count features that should repeat. Check sleeves, earrings, chair supports, window divisions, and other paired details against the object's actual design.
A clean face doesn't compensate for a product that changed shape.
For a series, keep an approved reference frame showing the face, outfit, and time of day. Compare later images side by side. Look closely at buttons, seams, hair length, and accessories instead of relying on memory.
Finish by checking the image at full size and as a thumbnail. If it implies a real event, customer, or endorsement that never existed, it is not a photograph to publish, however tidy the details look.
A viewer can decide an image looks real in a glance. The caption should make clear what was generated, transformed, or staged before that impression becomes a false claim.
A selfie transformation, an Etsy product scene, and a fictional character call for different wording. For a transformed selfie, say it was edited with AI. For a product listing, distinguish the actual item from its synthetic surroundings. Present a character concept as artwork, not a photograph of a model.
| Creator case | Practical disclosure | Why it matters |
|---|---|---|
| TikTok selfie transformation | Caption says the image was AI-generated or transformed with AI | Viewers may read the person as a real likeness |
| Etsy listing of a scene the product was never shot in | Caption says the scene is synthetic and identifies the actual product | Buyers may rely on the image to judge the item |
| Book cover or character concept | Present it as art, not a photograph of a real model | Viewers could mistake the character for a real person |
| Image implying a real event, customer, or endorsement | Do not present it as documentary photography | The image could falsely suggest someone attended, bought, or endorsed something |
These are practical editorial standards. Platform rules and laws may set different requirements. Describe a product as real only when the image accurately represents it. A caption cannot fix an invented clasp, altered fabric, or misleading size.
The European Commission's Article 50 transparency FAQ describes provider duties for machine-readable marking and detection of generated or manipulated synthetic content. Those duties are distinct from a creator's visible caption.
The FAQ covers synthetic images, audio, video, and text, with narrow exclusions such as short number or code sequences. For your own publishing decision, ask what a reasonable viewer could infer. If an image suggests a real person attended, endorsed, or wore something when they did not, do not present it as documentary photography.
C2PA Content Credentials use a signed provenance manifest that can record an asset's origin, creation, editing history, and AI involvement through a machine-readable source-type field. That history can show how a file was produced, information that visual inspection alone cannot provide.
Screenshots, heavy crops, file conversions, and social recompression can remove or disrupt provenance information. Missing credentials therefore do not prove that an image came from a camera.
Keep the original export and any attached provenance. Add a plain visible disclosure as well, since viewers may encounter a repost without the original file history.
For images you did not create, use a guide to identifying AI-generated images. A visual oddity can prompt closer inspection, but it is not proof of how an image was made.
Choose a photo you already have permission to use, or write an idea you can finish today. Don't begin with a whole catalog, a full fictional cast, or a complicated crowd.
A manageable assignment gives you room to make deliberate choices. You can tell whether the result serves its purpose without getting distracted by the appeal of another style.
With starryai, you can upload a photo and let our AI editor turn your words into high-quality visuals, or start from text. We offer daily free AI images without watermarks, and you can download generated images instantly in high resolution or share them directly on social media.
Try this starter brief:
Create an everyday portrait of a fictional person adjusting a jacket beside a cafe window, 50mm equivalent, f/4, one window light, one flyaway hair, natural fabric texture, canvas matched to the social post.
Keep the assignment modest. The purpose is to produce an image you can confidently describe, not to make the most elaborate scene the generator can attempt.
If you're transforming your own selfie, decide what must stay recognizable before you begin. If you're inventing a character, decide which identity details must remain stable when you return to that character later.
Use a simple caption line such as AI image. For an accurately represented physical item placed in invented surroundings, synthetic scene, real product makes the distinction more useful to a buyer.
A watermark-free export isn't an instruction to conceal the process. It gives you a clean file; your caption supplies the context.
Skip another style pass until the labeled version works at its intended display size. Otherwise, you're comparing unfinished experiments rather than deciding whether you have a usable asset.
For a shop, book, or advertisement, keep the reference beside the final artwork during approval. Don't let a compelling synthetic frame become evidence that a person was present or that a customer used the product.
The standard is straightforward: it should look photographed and still tell the truth about how it was made. A finished creative asset needs both the image and the explanation.
Visit starryai to start from a text idea or transform a photo with clear directions for light, action, and camera feel. Generate your candidates, choose a coherent frame, and add a plain AI disclosure before downloading or sharing the finished image.


